Welcome to L2 Interlude Wiki!
For a comprehensive, updated guide, visit the knowledge base of Lineage 2 Interlude.
L2 Interlude Leveling Guide
Frozenn’s Adventure Guide
Hey everyone, I decided to start working on a guide to help players (new and old) getting started on their journey in Lineage 2.
This guide will comprise of mostly early game quests (for XP and Adena), early / mid game farming spots, ways to save Adena, and overall tips for your adventure in the word of Lineage2.
At the time of writing this guide, I have been playing Lineage2 for around 12 years (with breaks in between), across multiple chronics, servers, and overall “times” of the game´s history.
This guide was written based on an x1 Interlude server, in time I may make more guides for different chronics/rates. Chapters 0 and 0.5 will be aimed at newer players, so fill free to skip those if you are familiar with Lineage2.
Chapter 0 -> Getting Started
The first and most substantial decision you will have to make is “What class should I play?”. While this is a very subjective decision and you should take your time to decide, I will provide an overall basic explanation of all the L2 Interlude classes in the game.
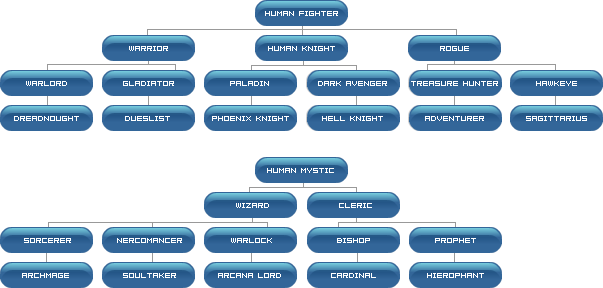
Fighter classes -> Humans
– Warrior -> Warlord -> Dreadnaught:
Fighter/Pole user, heavy focus in PvE content by taking on large groups of mobs at the same time. Can be used as a “meat shield” in PvP, while making use of his AOE stuns.
Pros: Good farmer, can help boost others, overall tanky
Cons: Not much damage in PvP, slow, if stun is resisted, provides little value.
– Warrior-> Gladiator-> Duelist:
Fighter/Dual-Sword user, a mixture of decent PvE and Strong PvP, scales well into the later stages of the game, good coverage of ranged and melee attacks, resistances, and HP/CP pool.
Pros: Great 1vs1 potential, has ranged attacks to deal with threats from afar, great overall “bulk”.
Cons: Relatively expensive to gear up, rough leveling experience.
– Knight -> Paladin -> Phoenix Knight:
Tank/Sword&Shield user, with extremely high defenses and HP pool, with a focus on side-heals and keeping threats away from the rest of the group.
Pros: Arguably the bulkiest tank in the game, with decent sudo-heal capability and CC potential.
Cons: Rough leveling experience due to lack of damage, doesn’t bring much utility to a flight due to being overall slow.
– Knight -> Dark Avenger -> Hell Knight:
Tank/Sword&Shield user, has the use of a panther pet that can deal decent damage, has a mixture of stuns and debuffs.
Pros: Panther can deal decent damage in a group environment, great 1vs1 due to being tanky and having the pet.
Cons: Panther can be expensive when you are just getting started, steals XP from you which makes your leveling a bit slower.
– Rogue -> Treasure Hunter -> Adventurer:
Assassin/Dagger user, has great mobility, decent HP pool, and can Lethal Strike for a quick kill.
Pros: High speed due to Dash skill, can open chests for the chance of extra Adena/enchants, if backstab procs Lethal it can end fights extremely quick.
Cons: Very dependent on the chance landing critical/lethal strikes, cant reliably use backstab until later on due to being very easy to turn around and avoid the skill that way, overall slow leveling.
– Rogue -> Hawkeye -> Sagittarius:
Archer/Bow user, has great mobility, decent HP pool, can do very reliable and constant damage with the chance for high critical hits.
Pros: High mobility lets him stay out of range of most threats, can survive a couple of hits due to decent HP pool, crits for high damage.
Cons: Extremely expensive leveling, the bow has a high consumption rate of SoulShots, needs to buy/craft arrows, overall very slow and expensive leveling experience.
Mystic Classes -> Humans
– Wizard -> Sorcerer -> Archmage:
Magic-user, has the most AOE ability of all mages, a decent amount of debuffs, overall OK stats all around.
Pros: Has a great time leveling up due to the high amount of AOE skills, kills fast, and doesn’t require many resources, overall good for a first character.
Cons: Lack of strength in single target, lacks the high damage of the dark elf and the cast speed of the elf, can be considered “jack of all trades, master of none”.
– Wizard -> Necromancer -> SoulTaker:
Magic-user/Sudo-summoner, has access to a lot of debuffs and curses, decent damage in single target with a decent-to-good AOE ability.
Pros: Acess to a summon to reduce the amount of damage taken, has the ability to debuff/curse multiple targets due to AOE debuffs, decent damage overall.
Cons: Extremely rough early leveling experience, can be relatively expensive due to the need for resources to use his skills.
– Wizard -> Warlock -> Arcana Lord:
Summoner, has access to pets that can aid in both attacking and buffing others, relatively cheap due to the fact of not needing much gear, cubics provide good support to the party, ability to summon party members to his location.
Pros: Easy class to play and learn, can be good both in solo and group content by using the summons, cheap to level since there’s no need for gear.
Cons: Can be rendered useless once the pet is killed/erased, lack of overall damage outside of pet damage.
– Cleric -> Bishop -> Cardinal:
Healer/Buffer, undoubtedly the best healer in the game, has access to a decent amount of buffs.
Pros: Unquestionably the best healer in the game, has access to decent buffs, can sleep enemies, and render them useless.
Cons: Extremely hard to level alone due to lack of damage against non-undead targets, can be tough to play due to being a very important part of every party.
– Cleric -> Prophet -> Hierophant:
Buffer/Healer, has a very wide range of buffs and debuffs, can side heal when necessary.
Pros: Has access to the highest amount of buffs out of any support, great unique buffs for both melee/ranged/magic classes, can help to heal when needed.
Cons: Overall a slow leveling experience due to lack of damage, mana issues when buffing multiple people due to the need for buffing 1 by 1.
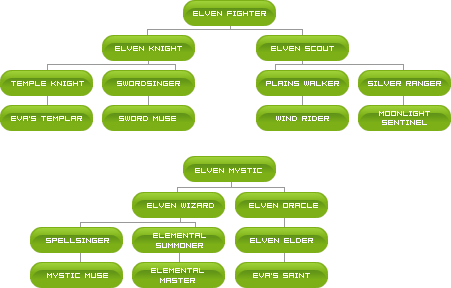
Fighter classes -> Elfs
– Knight -> Temple Knight -> Eva´s Templar:
Tank/Sword&Shield user, has access to cubics that can help the party by healing/damaging enemies, can sudo-heal.
Pros: Cubics provide an OK help to party members both in PvE and PvP, has access to strong heals, high evasion.
Cons: Low damage overall, slow leveling experience.
– Knight -> Swordsinger -> SwordMuse:
Support/Sudo-Tank, has access to songs that boost party members that are within a certain range of the cast, can help with tanking.
Pros: Amazing support provided with the songs, can boost both offensive and defensive abilities, has access to AOE and single-target debuffs. High defense, relatively easy to find parties for XP.
Cons: Lacks a lot of damage, a big gap between learning good buffs, slow leveling experience, can be relatively boring to play due to the style of the class.
– Scout -> Plains Walker -> Wind Rider:
Assassin/Dagger user, has high base speed and evasion, can open chests for extra loot, and has a decent heal. Can land a deadly blow to end fights quick.
Pros: High base stats, can sustain when farming alone due to having a decent heal for himself, if lucky with critical and deadly blows, fights end quickly.
Cons: Lack of overall damage, even when compared to other daggers, very reliant on the luck of skills, slow leveling experience.
– Scout -> Silver Ranger -> Moonlight Sentinel:
Archer/Bow user, has high base speed and can land critical shots for a respectable amount of damage.
Pros: High speed makes him great in open-world fights, access to a decent self-heal, and agro reset.
Cons: Lacks damaged compared to the other archer classes, very slow and expensive leveling experience.
Mystic Classes -> Elfs
– Wizard -> SpellSinger -> Mystic Muse:
Magic-user, has access to decent AOE skills, debuffs, and single target nukes. High cast-speed.
Pros: Has the highest cast speed of all the mages, can deal significant damage in a prolonged fight, access to debuffs, and a high chance of canceling others attacks due to the number of casts it can do in a short period.
Cons: Lacks damaged compared to other mages, can burn mana very quickly due to casting a lot of spells, lack of self-healing/self mana regain skills.
– Wizard -> Elemental Summoner -> Elemental Master:
Summoner, has access to pets that can fight or help others by buffing, has good AOE ability due to the summon, cubics provide good support to the party, ability to summon party members to his location.
Pros: Great AOE ability due to having a strong summon and a empower buff for it, relatively cheap and easy to play, fast leveling experience.
Cons: Can be very easily shut down by killing/erasing the summon, lack of utility in a melee party.
– Oracle -> Elven Elder -> Eva´s Saint:
Recharger/Buffer/Side-Healer, has access to recharging mana of other players, provides good buffs, can help on healing, has a wide variety of debuffs
Pros: Great partner to mages due to recharge and a wide variety of mage buffs, best healer after the bishop, can level up pretty fast even solo in the appropriate spots (undead mobs), strong in PvP due to the high casting speed/debuffs
Cons: Lacks fighter buffs, limited zones to level up due to being able to kill undead mobs only, high skill ceiling due to being super imperative in a PvP situation
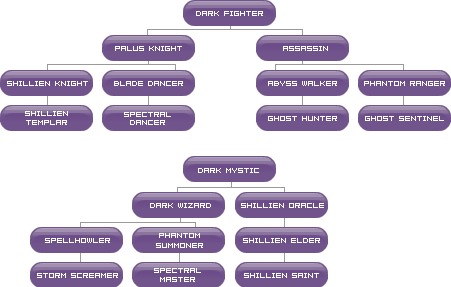
Fighter classes ->DarkElfs
-Knight -> Shillen Knight -> Shillen Templar:
Tank/Sword&Shield user, has access to cubics that can support the party or himself, high damage compared to other tanks, access to potent debuffs.
Pros: Cubics provide an OK benefit to the party, has access to a good amount of debuffs, high damaged compared to other tanks.
Cons: Low defensive stats when compared to other tanks, overall a bit of a slow leveling experience.
– Knight -> Blade Dancer -> Spectral Dancer:
Support/Dual-Sword user, has access to dances that provide buffs to party members that are within range, can do a respectable amount of damage, access to debuffs.
Pros: Great support provided by the dances, to both melee and mage party´s, can do a decent amount of damage, has access to a variety of debuffs, has no issues finding parties for XP.
Cons: Overall low defensive stats, expensive due to the need for dual-swords to cast his dances, can be boring due to play-style.
– Assassin -> Abyss Walker -> Ghost Hunter:
Assassin/Dagger user, can deal a high amount of damage even when not landing critical strikes, if Deadly blow procs it can end fights instantly, has access to the opening of chest and debuffs
Pros: Highest base damage of all daggers, can kill even when skills don’t critically land, a deadly blow is a guaranteed one-shot, can open chest for extra resources, and has access to debuffs.
Cons: Low mobility and low defensive stats, can easily be eliminated before getting close to the target, somewhat dependent on skill luck, slow leveling experience.
– Assassin -> Phantom Ranger -> Ghost Sentinel:
Archer/Bow user, can deal a high amount of damage normally, can deal super high damage with critical shots, has access to debuffs.
Pros: High base damage, can deal significant damage even when not critically hitting, critical shots can one-shot robe users, has access to debuffs
Cons: Low mobility and HP pool, can easily be caught up to and killed by most melee, expensive and slow leveling process
Mystic Classes -> DarkElfs
– Wizard -> SpellHowler -> Storm Screamer:
Magic-user, has the highest base magic power of all mages, has access to self-healing and self mana regaining skills, great AOE, and single-target spells.
Pros: High damage, can quickly kill anyone if lucky with critical hits, great solo farmer due to self-healing and self mana regaining skills.
Cons: Low cast speed, lack of mobility, and debuffs.
– Wizard -> Phantom Summoner -> Spectral Summoner:
Summoner, has access to single-target and Sudo-tanking pets, cubics provide good support to the party, can summon party members to his location.
Pros: High single target damage, can level up incredibly fast and cheap due to the summon having great stats and built-in life steal.
Cons: Provides little to nothing to a party outside of cubics, lacks AOE pet, and buffing pet.
– Oracle -> Shillen Oracle -> Shillen Elder:
Recharger/Buffer/Healer, has access to the recharge spell, has great buffs both for melee and mage set-ups, can help with healing if needed.
Pros: Recharge makes it a great duo partner for any mage, has very useful buffs for both melee and mage player alike, fast leveling due to high demand, can help to heal.
Cons: Lack of damage for solo leveling, falls off later in the game due to not gaining many more buffs after a certain threshold.

Fighter classes -> Orcs
– Raider -> Destroyer -> Titan:
Fighter/Two-Handed Sword user, has incredible damage capability, very sought after for raids.
Pros: Best class for farming, has high offensive stats, gets more powerful the lower the HP, always wanted for raids, extremely fast leveling experience, easy to play, and learn.
Cons: Lacks mobility, can easily be kited/killed before getting to his target, lack of utility in PvP outside of the damage it provides.
– Monk -> Tyrant -> Grand Khavatari:
Fighter/Fists user, has high attack speed, access to a large pool of self buffs, can use ranged attacks.
Pros: High versability due to having access to a lot of self buffs, high attack speed making it a good damage dealer, can use ranged attacks, gets more powerful with lower HP
Cons: Expensive due to high shot consumption due to having high attack speed, not much utility outside of its damage.
Mystic Classes -> Orcs
– Shaman -> Overlord -> Dominator:
Buffer, can buff entire and entire clan and alliance at the same time, has great buffs for mage setups, can heal CP, and increase its amount.
Pros: Only class in the game that can increase and heal CP of others, can buff entire clans and alliances at the same time, great mage buffs.
Cons: Lack of damage, slow leveling experience, doesn’t fit well in melee set-ups, can be boring due to play-style.
– Shaman -> Warcryer -> Doomcryer:
Buffer, can buff an entire party at the same time, has great buffs for a melee set up, can summon entire party´s to his location.
Pros: Can buff an entire party at the same time, has access to great buffs for a melee set up, can help side-healing, ability to summon the entire party to his location
Cons: Lack of damage, slow leveling experience, doesn’t fit well in mage set-ups, can be boring due to play-style.
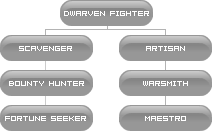
Dwarf Classes -> Scavenger -> Bounty Hunter -> Fortune Seeker:
Fighter, can spoil monsters to obtain extra loot, needed for late-game material farming to crafting equipment.
Pros: Ability to generate extra income due to being able to obtain extra loot, extremely needed later into the game due to being necessary to obtain materials for equipment, easy to play.
Cons: Somewhat low damage, not very useful in party environments, slow leveling experience.
-> Artisan -> Warsmith -> Maestro:
Fighter, can craft materials and resources for others or himself, needed for late-game equipment crafting.
Pros: Ability to craft equipment and resources for himself or others, extremely needed later into the game due to being necessary to craft the equipment.
Cons: Extreme lack of damage, not useful in party environments, slow leveling experience, may be considered boring due to play-style.
————– Chapter 0.5 -> What Are All These Buttons ————
So you made your character, you are now entering the world of Lineage2, but before you go, here are a few tips and tricks that will help smoothen your humble beginnings.
-> You can automatically use your soul shots/spirit shots by right-clicking them in your action bar
-> Once you are level 6, you get a free no grade mid-tier weapon of your choosing from the Adventurer´s Guide, you can get a free D grade weapon once you get to level 20 and complete the first class transfer. (These weapons are removed from your possession if you PK any player, so don’t be a naughty boy).
-> Once you are level 8, you can start getting buffs at the Newbie Guide, you get new buffs until you reach level 15. You will start losing buffs once you reach level 20, losing the last buff at 25. This buffs last 1 hour and make sure you keep taking them every time they run out / you stop by town, they make life a lot easier
-> If you are low on money, you have access to a free 5-minute long cast Scroll of Escape by using /unstuck
-> Use your SP (Skill Points) wisely early on, those are rough to acquire early in the game
-> Pick up everything you see on the floor, you will need every single Adena!
-> Use websites like https://lineage.pmfun.com/ to look into what your skills do before investing in them.
-> And the most important part, HAVE FUN! And don’t be scared of asking for help, we were all new at some point.
-> You need to buy spellbook to learn your skills under level 40, there is a spellbook seller in every Temple/Chruch in towns. After you reach level 40, your spell books drop from mobs around the map.
-> Use the command /loc to know your exact location, so you know to which town you will go once you use an SoE.
-> Teleportation Tricks is a way to get to your destination for a cheaper price by teleporting to different towns, teleporting to farm zones and using an SoE, or simply running. For a more in-depth explanation, please check https://l2.ggames.eu/quests-f28/saving-adena-with-smart-teleporting-t153.html?sid=ac57fd08dd5bc0e8dcc26d1d0e87875a.
-> Make sure you take the Quest for Fishing Shots whenever you see the Fish Guild Member (He is located in the Grocery Store of every town) for free whenever money.
————– Chapter 1 -> A New World ————
(Here is where the guide starts, from here on out I will assume you have a basic knowledge of the game, if you ever have doubts about anything here, feel free to reach out to me!)
This guide will be useful for every class since I will add routes that I recommend for every type of class, at some stages of it every class will be farming in the same spots, but with time there will be differences.
So you just joined the game, you checked your keybinds, changed the audio settings, and are ready to explore, so let’s get it started!
Level 1-6
This is the most basic stage of the game, at this point, you really just want to kill whatever you see to get XP, so kill some gremlins in your corresponding starting zone until you get to level 6.
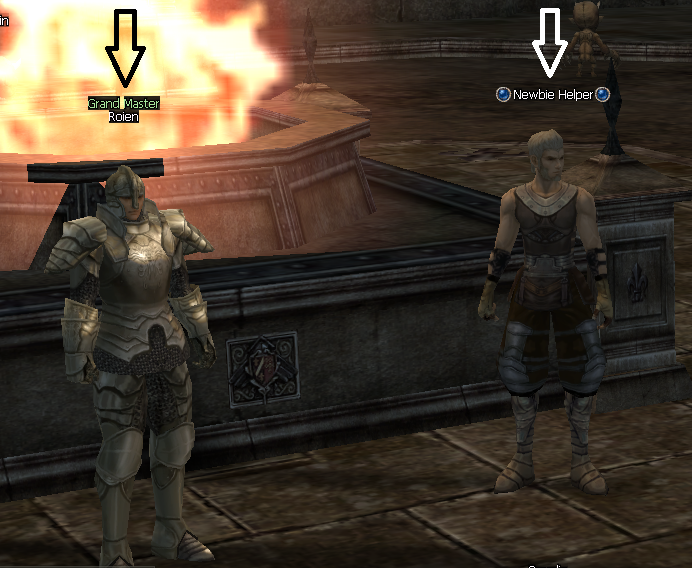
[NOTE->Be sure to speak with the Newbie Helper to get a quest for soul-shots/spirit-shots, after you complete his quest, speak with the NPC next to it]
Level 6-8
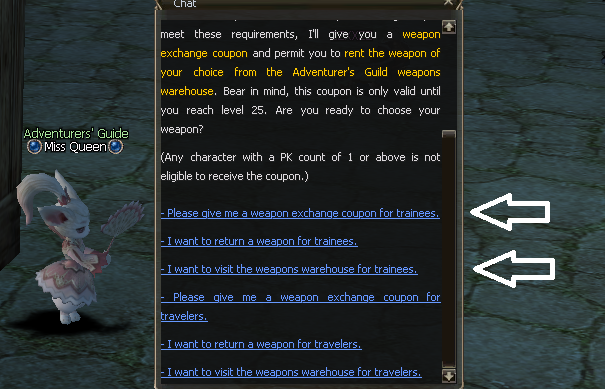
Once you reach level 6, go speak with the Newbie guide in the town to get more soul-shots/spirit-shots and newbie traveler tokens, after that you will want to speak with the Adventurer Guide and receive your new weapon. Once you have it in hand, you will want to take a quest that will reward you with more soul-shots/spirit-shots, every starting area has its own quest so look for the one respective for your race. You will kill mobs related to this quest until youreach level 8.
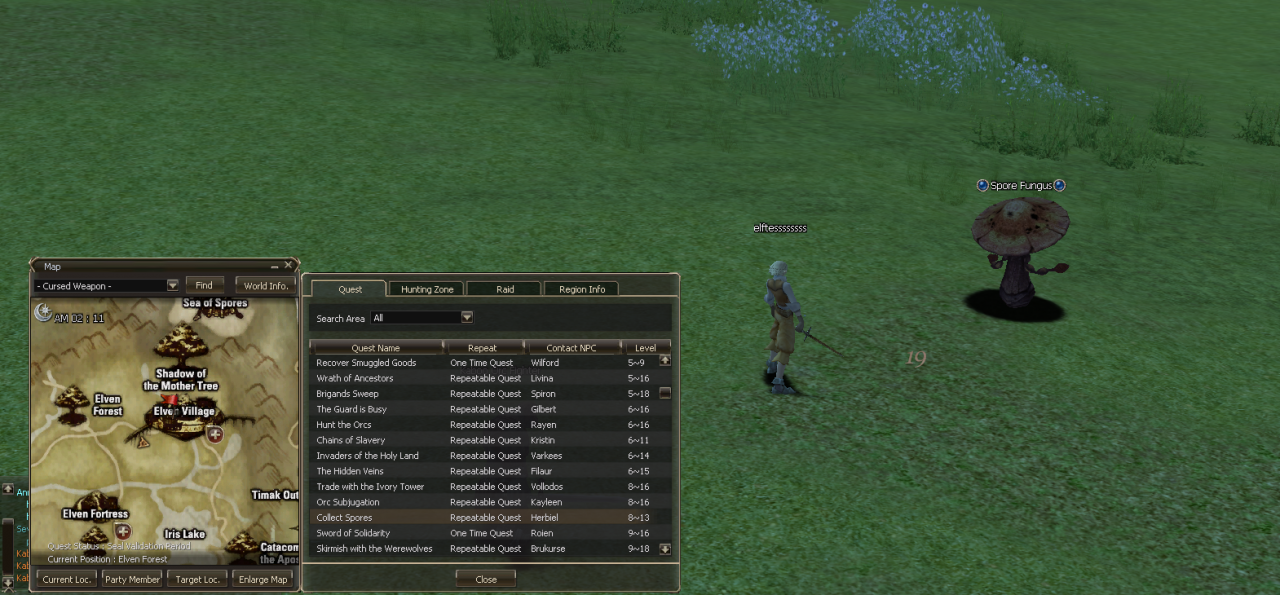
Human Quest ->The Guard Is Busy
Elf Quest ->Hunt The Orcs
Dark Elf Quest ->Chains Of Slavery
Orc Quest ->Invaders Of The Holy Land
Dwarf Quest ->The Hidden Veins

Level 8-15
Once you reach level 8, you will want to turn in the previously taken quest to receive more soul-shots/spirit-shots for your journey. You will then speak with the Newbie Guide and chose to use the newbie travel tokens, you will then teleport to the Elf village.

Once you are in the elf village, go towards the Grocery Store and speak with Herbie, take his quest called Collect Spores.
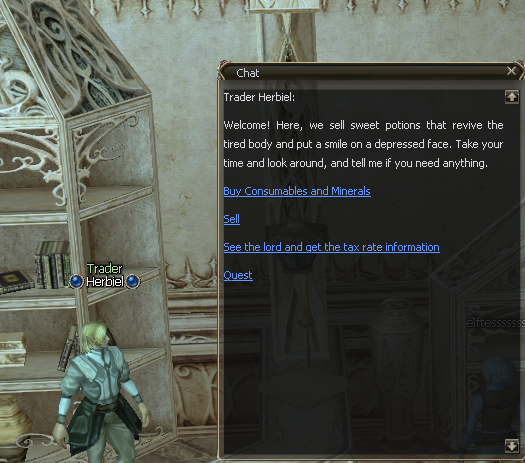
Your goal is now to take this quest, go kill the mobs for the quest (Spore Fungus, they are just outside the elf village), complete the quest by speaking with Herbiel, take the quest again, and repeat… until you reach level 15… (Goal is getting decent Adena from reward + XP from the mobs) [It should net you around 50k adena].
Level 15-21
Once you reach level 15 and deliver the quest for the last time after murdering thousands of Mushrooms, you will want to head towards Gludio for your next step, a good way to get there for almost free is 1->speak with the newbie guide, use the travel tokens and teleport to the dark elf village, 2->speak with the gatekeeper and teleport to the neutral zone, 3->use /unstuck or a scroll of escape and you will be in Gludio.
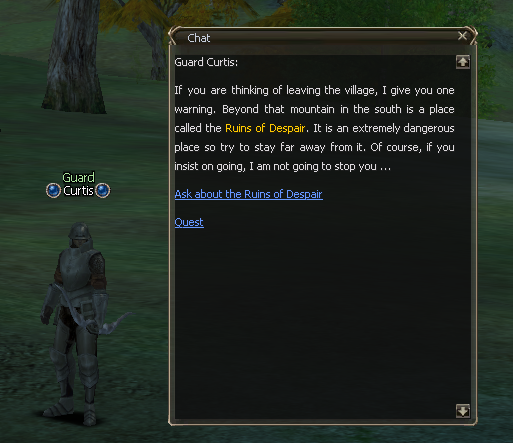
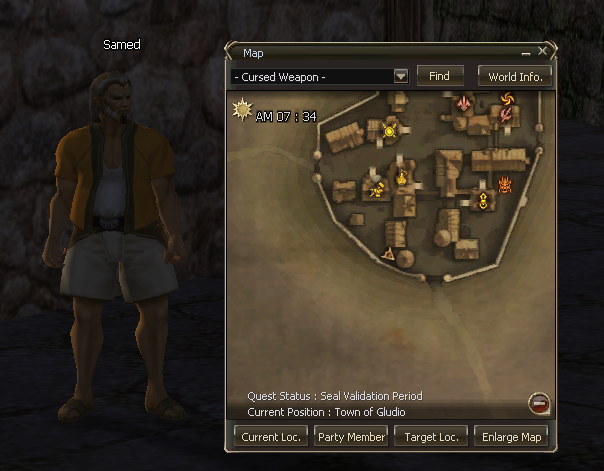
Once in Gludio, you will want to speak with Curtis and take his quest called Grim Collector. The next step is speaking with Samed, he will give you the Anatomy Diagram which is needed for the next step of the quest.
Now you are ready for the next grind session, you will go to Ruins Of Despair and kill Shield Skeleton and Skeleton Infatryman until you reach level 18.
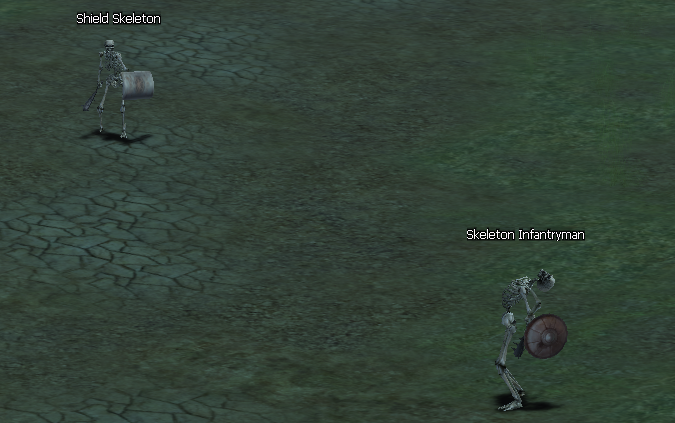
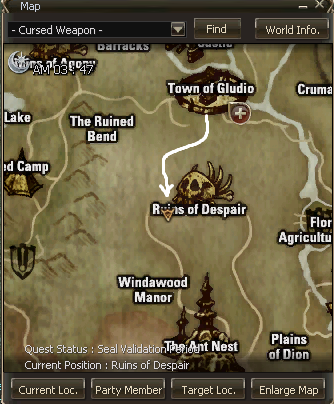
Once you reach level 18, you will want to move to Ruins Of Agony, once there you will hunt Skeleton Scout and Tracker Skeleton Leader until you reach level 21.
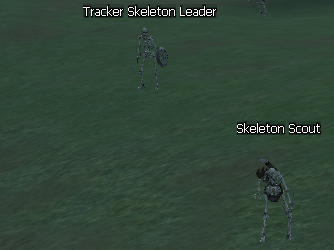
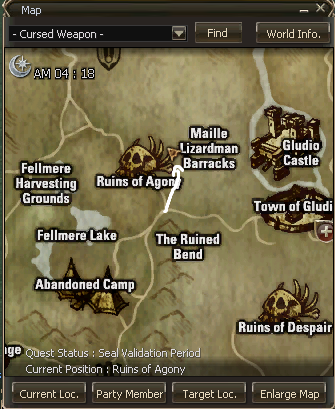
Once 21 is reached, you will be done killing… skeletons?… well, at less they were dead already…
Speak with Varsak to assemble complete skeletons from the pieces you collected, this is to obtain as much Adena as possible from the quest. Once the skeletons are assembled (Note: you may fail the assembly of the skeletons, its completely RNG) speak with Samed to turn in the quest. [It should net you around 80k-100k adena].
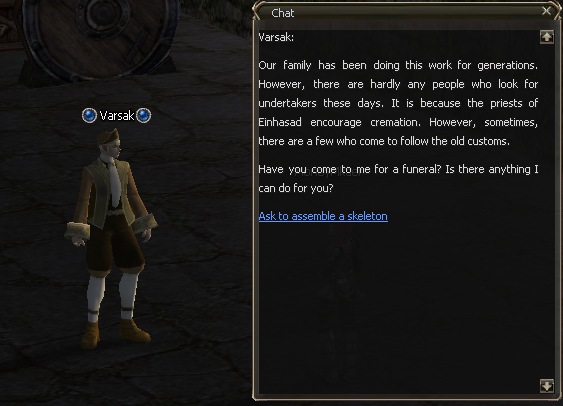
Level 20 -> First Class Transfer Quest
Now, once you get to level 20 you can do the quest to change to your first job. I won’t be describing each quest individually here but I will provide links for them.
Human Fighter Classes
Human Magic Classes
Elf Fighter Classes
Elf Magic Classes
Dark Elf Fighter Classes
Dark Elf Magic Classes
Orc Fighter Classes
Orc Magic Classes
Dwarf Fighter Classes
Level 21
This is where the first “split” happens, up until this point every class was meant to take this route, but after you change jobs, certain classes start to gravitate towards certain spots and routes.
From this point forward, routes will be divided into Magic, Fighter, and Support.
I will also sprinkle in suggestions for party farming options.
Note: After you complete the first-class change, you get access to a permanent D grade weapon from the Adventure Guide.
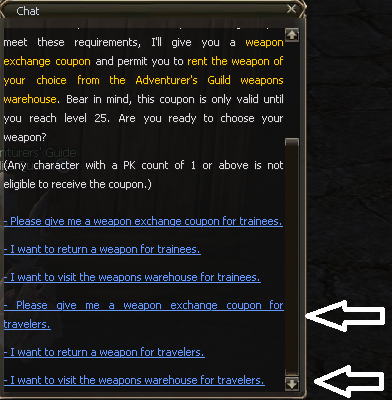
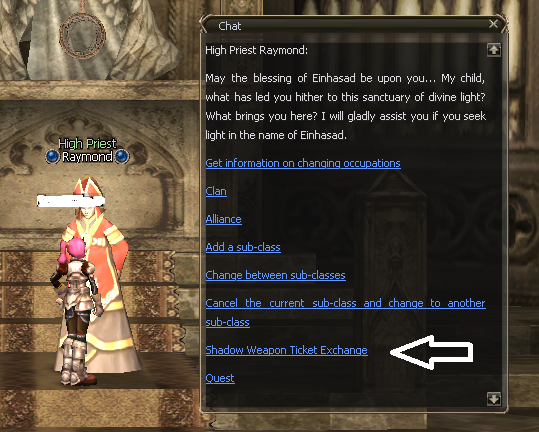
You also receive Shadow Coupons as a reward from finishing the class transfer quest, you can trade these coupons in any master in Gludin or Gludio (I usually speak with the High Priest), these weapons are more powerful than the Adventure Guide ones but they have a limited amount of usages (90 minutes, only consumed when equipped).
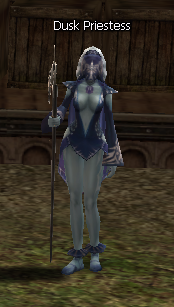
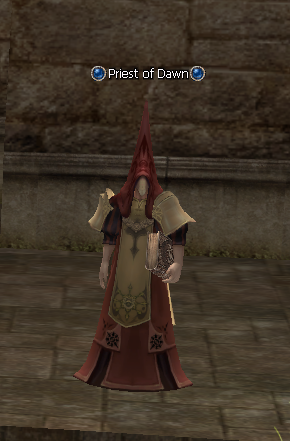
Make sure you register in a Priest of Dusk or Dawn to gain access to the catacombs/necropolis.]
Level 21-30
This is when you will start to see different classes going to different locations since after you finish the first class transfer you will start noticing differences in skills around the class archetypes (Melee, Magic, Support). My recommendations for farming spots/quests around those areas are as follow.
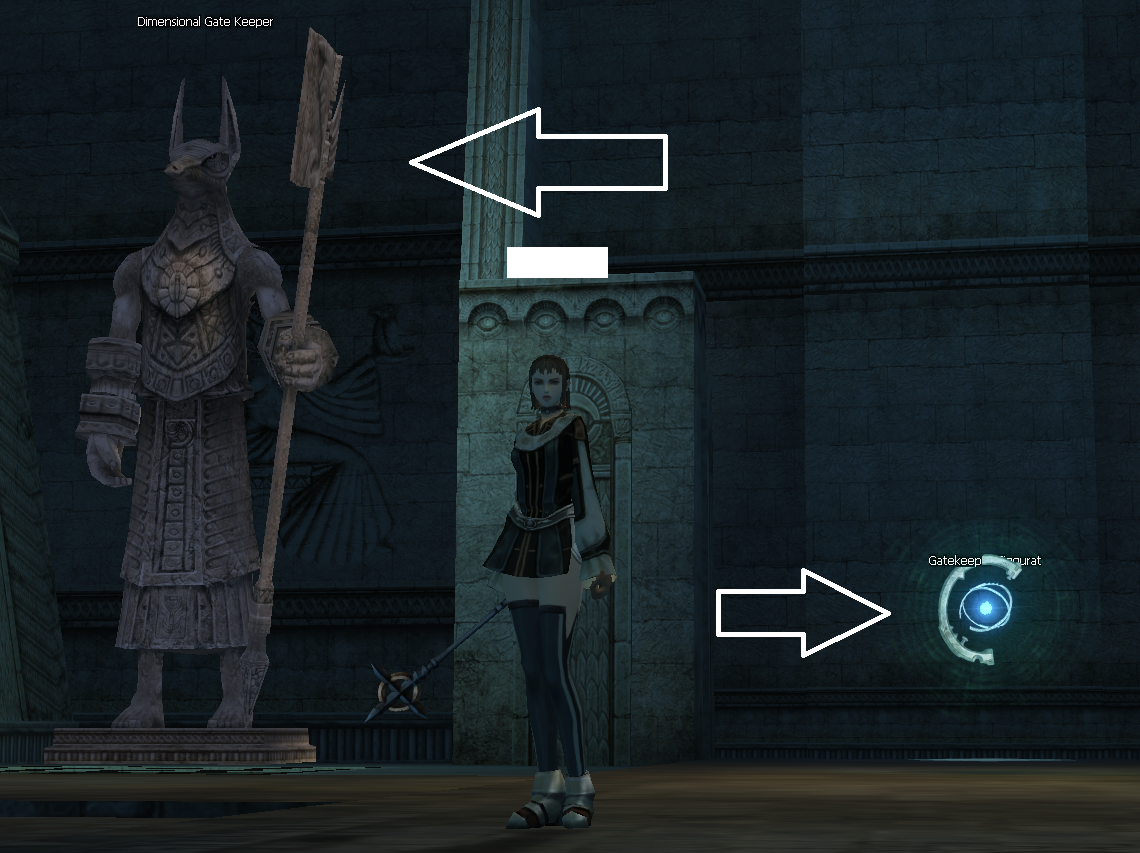
- Melee -> As a melee class, you are still similar to other melee classes overall, so you can farm more or less around the same locations. My recommendation would be the Necropolis of Sacrifice if you have access to a Clan Hall for buffs or a buffer friend.
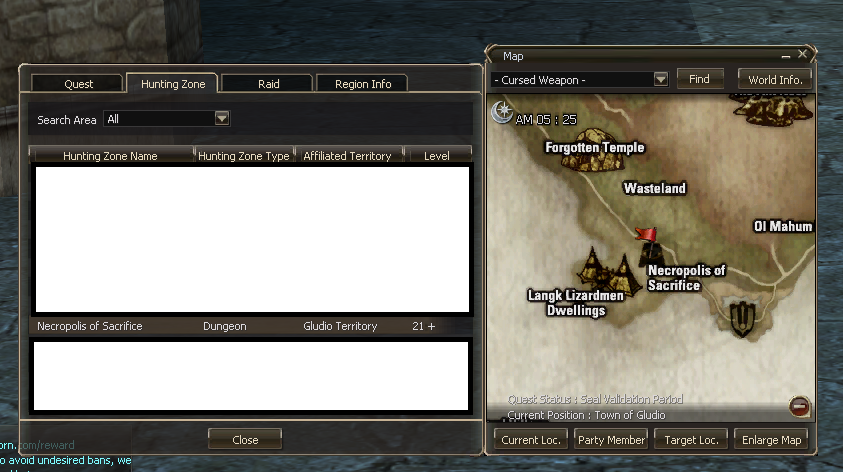 If you go to this location, be sure to take the quests Yoke Of The Past and In Search Of Fragments Of Dimension from these 2 NPCs.
- If you do not have this, your safest bet would be the Abandoned Camp.
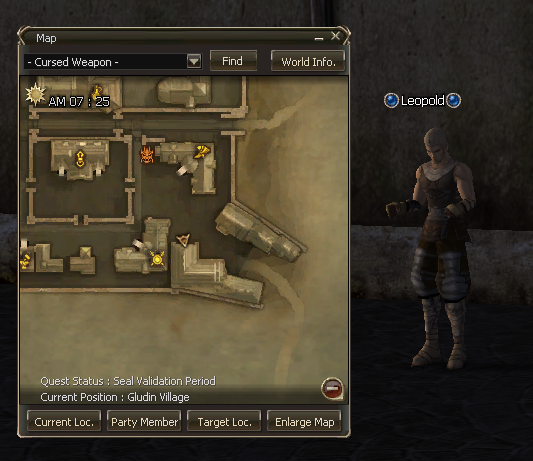
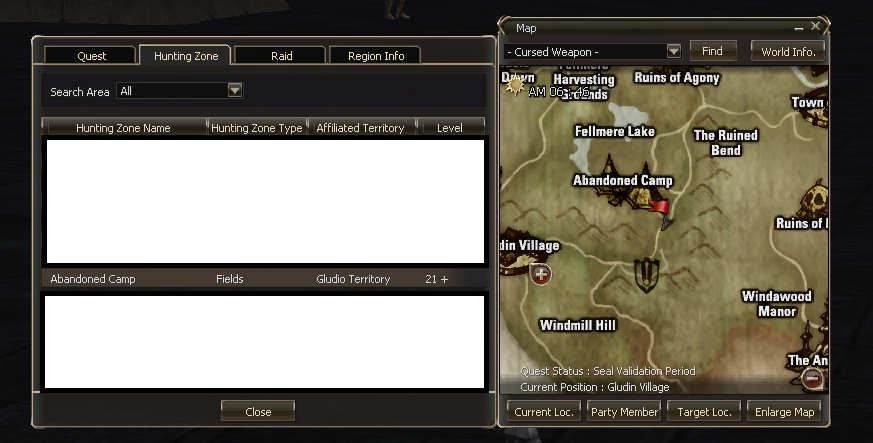 You can kill 1 by 1 inside or make trains on the inside bit. (Note, you will need at less an attack speed potion and HP potions to make trains.). For more information on how to make a decent train and kill it safely check https://www.youtube.com/watch?v=ErwkpgSgBmA&feature=youtu.be. If you decide to farm here, be sure to take the quest Vanquish Remnants from Leopold just outside the Grocery Store in Gludin. This quest has an unlimited amount of items so you can keep killing monsters until you are ready to leave this place and then turn it in for Adena. [Note: You can do smaller / bigger trains as you see fit, this is purely an example of one that I usually do].
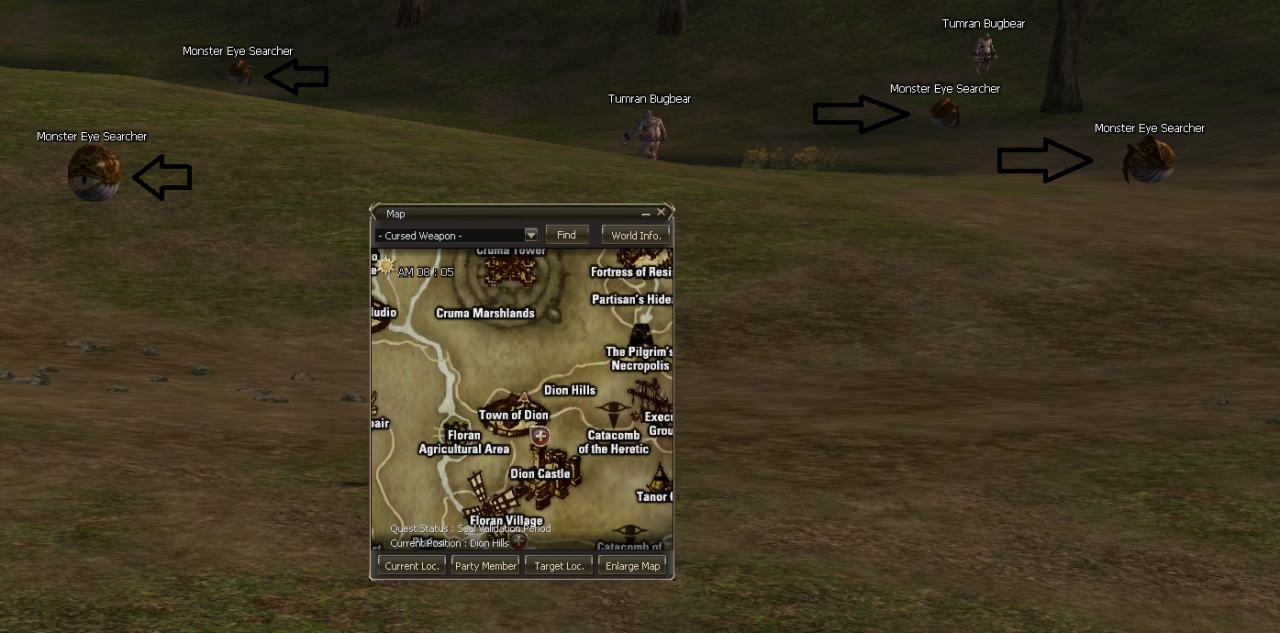
- If all of the above proves to be difficult for you, I would recommend going to Dion Hills and hunt for Monster Eye Searcher. This spot is aimed at people with very bad gear and no buffer/clan hall or dwarfs since the monsters have good odds of spoiling animal bones. Sadly there is no quest for this spot. [Note: The mobs may use a magic spell sometimes, so be sure to have at less no grade jewels equipped.]
- Magic ->Same principle applies to magic classes, you are all still very similar to one another. Your best bet will be Abandoned AbandonedCamp. You can kill 1 by 1 altho I highly recommend making trains since, unlike the melee classes, you will attack from afar, therefore, removing the need to have good armor and having more money to invest in your weapon and shots. You can make trains here even without buffs, all you need is a Speed potion that you can buy from the Grocery Store (altho obviously if you can find a buffer/clan hall, the process will be much faster). Check above to see the quest for this location. For more information on how to make a decent train and kill it safely check https://www.youtube.com/watch?v=DxhYVS4YrO4&feature=youtu.be.
- Supports ->This is the group that will have the most difficult time at this stage since there’s a lack of overall damage abilities at your disposal. The supports can be divided into 2 groups, the ones that have skills to kill the undead and the ones that do not (basically only the orc shaman lacks this skill, you got the short end of the stick). I will recommend a different route for both of these groups, but from this stage onwards, I highly recommend that you look for a group with DPS classes since they will want your support (be it buffs or healing) and you will want their damage.
- With Disrupt Undead- Your best bet is Execution Grounds, this zone posses a wide range of Undead mobs from a decent level range, so you can stay here until level 30. The only quest for this place is Hunt Of The Black Lion. To take this quest, you must first complete Vanquish Remnants. I highly recommend doing so because this quest can net you a good sum of money. The quest requires some explanation so I suggest you check out http://archive.l2portal.com/Quests%20WalkThrough/Mainland/019.html for it.
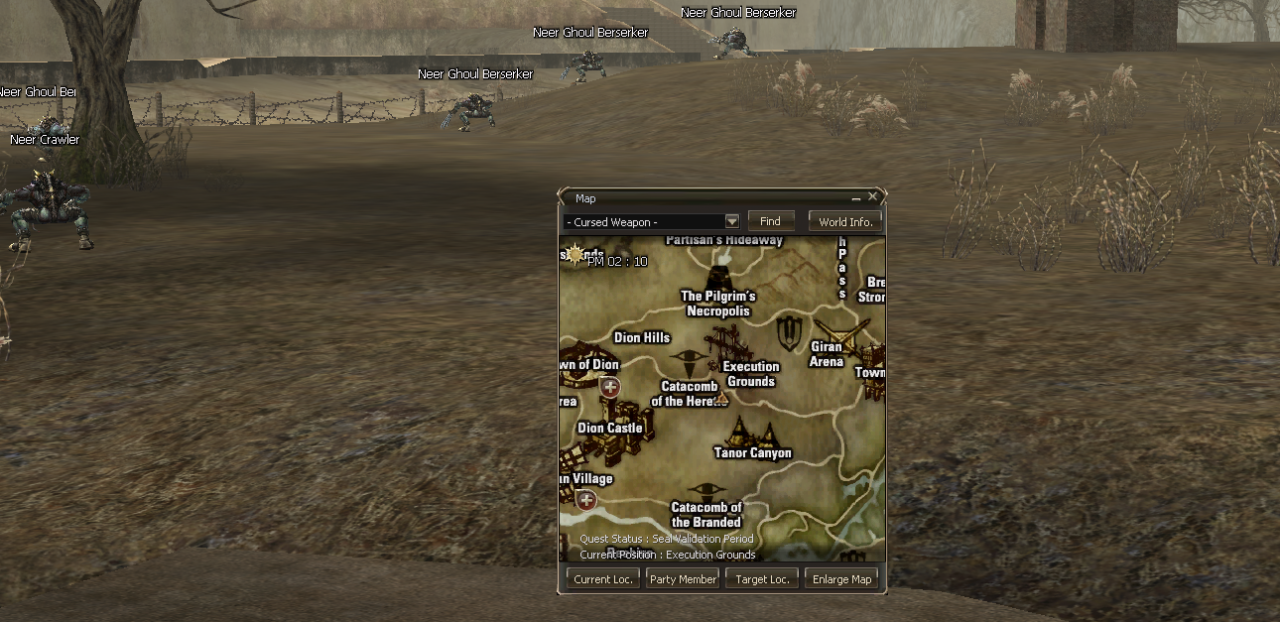
- Without Disrupt Undead- Now, this is by far the hardest class to level up since you lack the damage of the DPS classes and the Disrupt Undead from the other supports. Your best bet is to either 1by1 in Abandoned Camp while doing the quest OR killing the eyes in Dion Hills. At this stage, I recommend that you try to make parties for farming since it will take you a significant amount of time and effort to do it all by yourself.
Level 30-35
You have spent 10 levels getting used to your new skills, so its time to ramp the challenge a little bit. This section isn’t too different compared to the last ones, but the farm zones are rougher, especially if you arent making slow upgrades to your gear. From this point onwards, a single mistake may lead to your demise, so let’s focus and get into it.
- Melee -> After spending so much time in that pesky catacomb, you would hope that it was finally time to see the outside but… The reality of things is that there is no better place for XP and Adena(Note: You make Adena by selling the SealStones/AA) then the catacombs. If you spent the section of 20-30 in the catacomb, your next place to farm will be Catacomb Of The Heretic. Once again, this location is mainly aimed at players that possess access to either CH Buffs or a buffer friend.
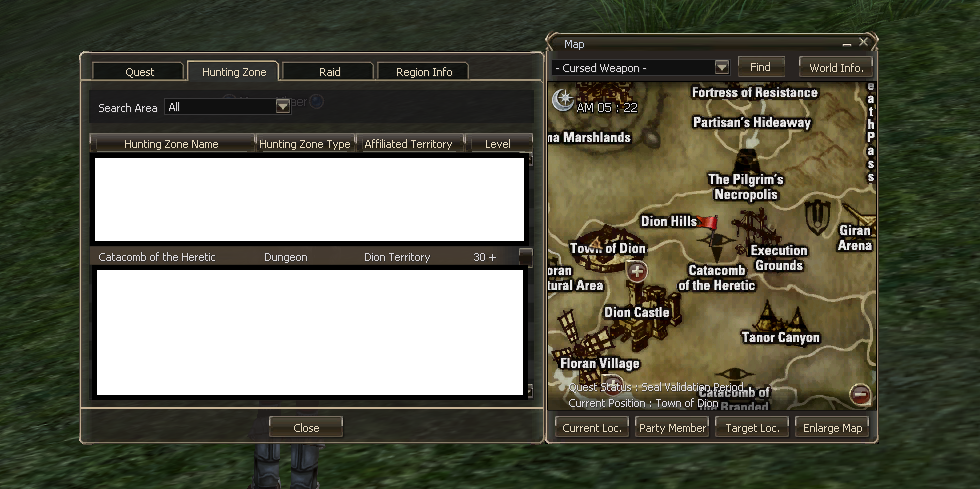
- If you lack strong buffs, my suggestion will be Partisan´s Hideaway. This location is safer due to mobs only being x1, so they are easier to kill. You can either 1by1 or make trains in this spot. You will also get some more items for the quest Vanquish Remnants. To see my pathing when making trains here, check https://www.youtube.com/watch?v=BMrpcVK_ZSs&feature=youtu.be
[Note: When making trains in this location, try and use a Bow to lure mobs and avoiding taking damage this way. Trains can be bigger or smaller, depending on your current gear/skill.]
- If both of these locations prove to be hard for you, I would recommend Execution Grounds, its the safes place that will hield a decent amount of XP. If you go here, take the quest Hunt Of The Black Lion by speaking with Sophya outside the Warrior´s guild in Dion.
[Note: To take this quest, you must first complete Vanquish Remnants, I highly recommend you do so since this quest can give a decent amount of Adena]
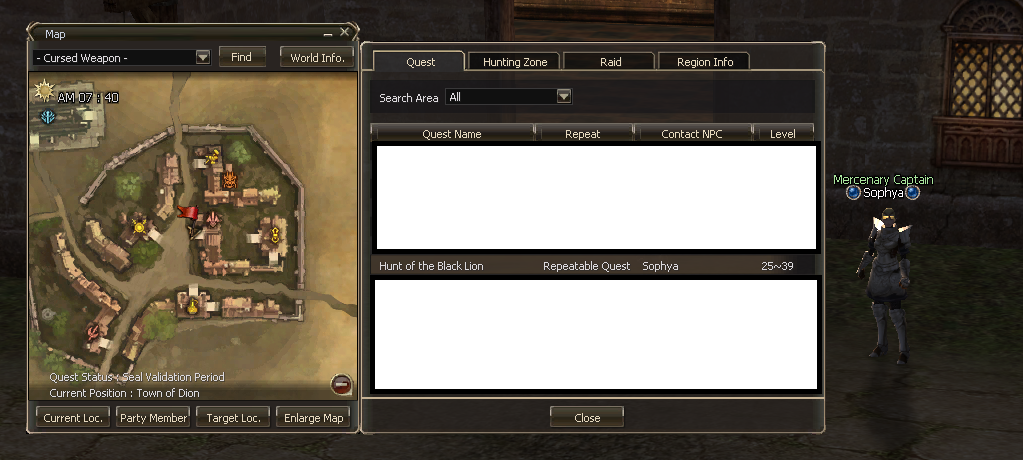
- Magic -> For mages, there are now 2 options where I would personally farm, one for those who have buffs and one for those who do not have them.
-> With Buffs- If you have access to buffs, be it CH or another player, I would recommend going to Partisan´s Hidewaysince you can make decently big trains ther in a safe manner while getting some extra items towards the Vanquish Remnants quest. To see my suggestion on how to train in this location, check https://www.youtube.com/watch?v=RTx26I8Uwrg&feature=youtu.be.
[Note: To make trains without getting hit, I suggest you learn Wind Shackle or Curse Weakness and keep it at level1, that way you keep the mana cost at a measly 3 while having a fast casting spell to pull the mobs.]
-> Without Buffs- If you lack the access to buffs, my recommendation would be Fields Of Silence. The monsters here are 1/2 HP, which means they die in 1 or 2 spells, making it a very cost-efficient place to farm (It also drops herbs). Once you hit level 32 you can also take the quest Black Swan from Gosta, the guard just outside the Grocery Store. This quest requires you to kill the mobs in Fields of Silence and has 2 separate rewards, the first being Adena and the second being an item you can trade for basic materials (which you can sell or save for your crafts later).
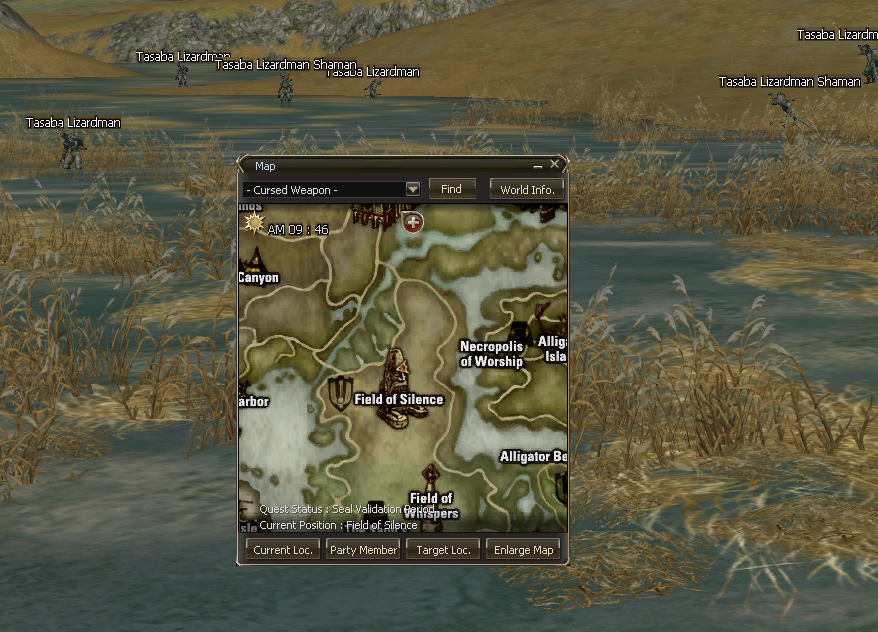
- Supports ->This part is, once again, divided into supports with access Disrupt Undead and supports without. Once again, the farming areas are very limited for both of these groups, so grouping up is strongly suggested. None the less, if you decided to farm alone, my recommendations are as follows.
-> Supports With Disrupt Undead – My recommendation is pretty simple, stay in Execution Grounds. The reason for this is due to the fact of a big lack of spots with undead monsters (or at less spots that are worth it). By staying here, you will move down to the area with the Ghouls. By staying here you will also keep on collecting items for the Hunt of The Black Lion.
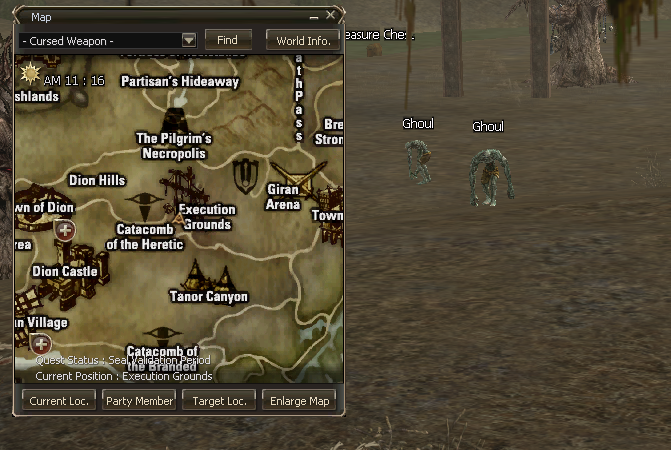
-> Supports Without Disrupt Undead – Once again this is by far the hardest set to level up, grouping up is almost mandatory at this stage and it will keep on becoming worse so at this stage I advise you to find a clan or a group of people to tag along with. If you still want to try soloing, your best bet is Fields of Silence. Mobs are 1/2 HP so they won’t be as rough to kill as in other places, once you reach level 32 you can take the Black Swan quest for some extra income.
Level 35-40
This is the last stretch before you reach the level for the 2nd class transfer, the leveling here is mostly consisted of staying around the same locations as mentioned above or changing in between them depending on your conditions (lack of buffs, groups, etc). Partisan´s Hideway and is no longer viable to XP in, I suggest those that were farming in this location move to Fields of Silence. [Note: Don’t forget to take the quest Black Swan].
The main change in this bracket comes in the form of preparation for the 2nd class transfer quest.
Ther are usually 2 options, you do them individually (The quest is divided into 3 parts, you gain access to the 1st part at level 35, the 2nd part at level 37, and the 3rd part at level 39), or you wait till level 39-40 and do them all at once. I prefer to do them all at once since some of the parts take you to the same place.
Second Class Transfer Quest
Congratulations, you have reached the point where you will start to feel the difference between every class, not just the class archetype. All you have to do now is a…. 3 part quest line…. that usually takes 8 hours…
Jokes aside, this quest is extremely time-consuming, and as mentioned above, there are 2 ways to do it. I will leave links that will send you towards this quests if you chose to do them individually, and after I will share the guides for doing them all at the same time, dubbed “The 3in1 Guides”.
Here are the individual parts of each quest.
Warrior -> Gladiator – Trial of the Challenger / Testimony of Trust / Test of the Duelist
-> Warlord – Trial of the Challenger / Testimony of Trust / Test of the Champion
Knight -> Paladin – Trial of the Calling / Testimony of Trust / Test of the Healer
-> Dark Avenger – Trial of the Calling / Testimony of Trust / Test of Witchcraft
Rogue -> Treasure Hunter – Trial of the Seeker / Testimony of Trust / Test of the Searcher
-> Hawkeye – Trial of the Seeker / Testimony of Trust / Test of Sagittarius
Wizard -> Sorcerer – Trial of the Scholar / Testimony of Trust / Test of Magus
-> Necromancer – Trial of the Scholar / Testimony of Trust / Test of Witchcraft
-> Warlock – Trial of the Scholar / Testimony of Trust / Test of the Summoner
Cleric -> Bishop – Trial of the Pilgrim / Testimony of Trust / Test of the Healer
-> Prophet – Trial of the Pilgrim / Testimony of Trust / Test of the Reformer
Elven Knight -> Temple Knight – Trial of the Calling / Testimony of Life / Test of the Healer
-> SwordSinger – Trial of the Challenger / Testimony of Life / Test of the Duelist
Elven Scout -> Plains Walker – Trial of the Seeker / Testimony of Life / Test of the Searcher
-> Silver Ranger – Trial of the Seeker / Testimony of Life / Test of Sagittarius
Elven Wizard -> SpellSinger – Trial of the Scholar / Testimony of Life / Test of Magus
-> Elemental Summoner – Trial of the Scholar / Testimony of Life / Test of the Summoner
Elven Oracle -> Elven Elder – Trial of the Pilgrim / Testimony of Life / Test of the Healer
Palus Knight -> Shillen Knight – Trial of the Calling / Testimony of Fate / Test of Witchcraft
-> BladeDancer – Trial of the Challenger / Testimony of Fate / Test of the Duelist
Assassin -> Abyss Walker – Trial of the Seeker / Testimony of Fate / Test of the Searcher
-> Phantom Ranger – Trial of the Seeker / Testimony of Fate / Test of Sagittarius
Dark Wizard -> SpellHowler – Trial of the Scholar / Testimony of Fate / Test of Magus
-> Phantom Summoner – Trial of the Scholar / Testimony of Fate / Test of the Summoner
Shillien Oracle -> Shillien Elder – Trial of the Pilgrim / Testimony of Fate / Test of the Reformer
Orc Raider -> Destroyer – Trial of the Challenger / Testimony of Glory / Test of the Champion
Orc Monk -> Tyrant – Trial of the Challenger / Testimony of Glory / Test of the Duelist
Orc Shaman -> Overlord – Trial of the Pilgrim / Testimony of Glory / Test of the Lord
-> Warcryer – Trial of the Pilgrim / Testimony of Glory / Test of the War Spirit
Artisan -> Warsmith – Trial of the Guildsman / Testimony of Prosperity / Test of the Maestro
Scavenger -> Bounty Hunter – Trial of the Guildsman / Testimony of Prosperity / Test of the Searcher
And here are the links for the “3in1” guides. I recommend you do it this way. (The page is an archive in Russian, use the automatic translation function from Google to translate it into English).
Human Rogue -> Treasure Hunter
Elven Wizard -> Elemental Summoner
Palus Knight -> Shillien Knight
Dark Assassin -> Phantom Ranger
Dark Wizard -> Phantom Summoner
Shillien Oracle -> Shillien Elder
Dwarven Scavenger -> Bounty Hunter
Congratulations, you have reached the end of this guide. I hope it helped you get to level 40 with 2nd class completed with a good experience.
I am planning on making new guides for multiple different things, so be on the look out for it.
Thanks everyone that checked all of this, you are the man/woman!
Made by Frozenn
Special thanks to @Tsipahh and @CEO
Stay safe, until we meet again!
I stream on https://www.twitch.tv/frostyfrozenn, if you want to support or give me feedback, check me out there.
For more direct and extensive feedback, message me directly in discord Frozenn#3319